

R/C Servos used to operate the three air vents
Notes:
There are three doors on the heater box. Top is for defrost, front is for A/C (directs air out of the dash and to left side & right spot coolers) and the third is on the bottom for heater. All three doors are operated from the driver side of the box by turning the rods that the doors are mounted on.
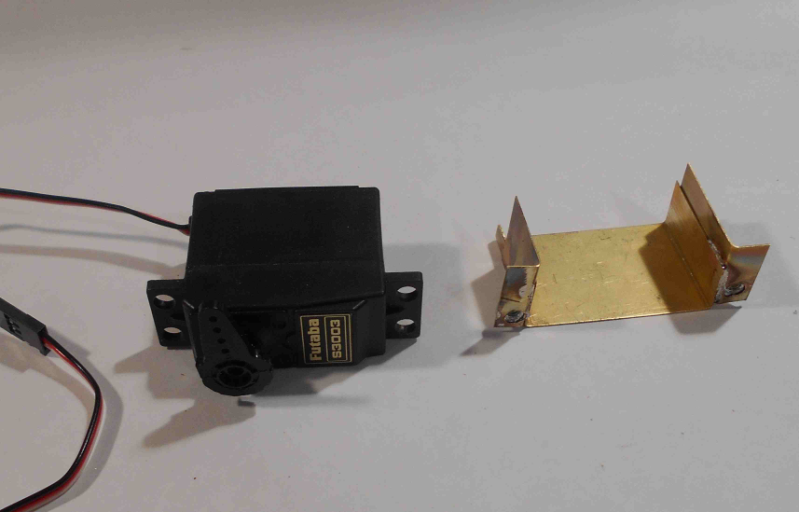
A little (cheap) servo was used to operate the defrost vent at the top. It operates an arm, mounted on the rod, cut from thin aluminum with a scissors which is barely visible at the top of the left picture. The servo is mounted to a brass plate which is epoxied to the heater box.
The A/C door (front) required more force, so a larger servo was used. The round metal disc was cut from 050 aluminum by scribing a circle and drilling holes around the scribe line, then cutting out the spaces between the circles to make a crude circle. A few minutes of filing made a presentable circle. The center hole and holes for the connecting wires were also drilled. A circular plastic arm that came with the servo was used as a template. The front door disc had to be cut to clear the air duct that runs just in front of the box to the circular opening partly visible at the right of the right picture.
The wire links from the servos to the discs is just ordinary hardware store soft iron wire.
The servos are mounted in thin brass adapters. The one for the A/C (front) door was poorly thought out. The second one (lower in the photo) seems much better and is simpler to build. They are both glued in place AFTER hooking up the link wire. Masking tape held them in place as the epoxy set.
The servos are controlled by a hand wired (temporary) controller with separate knobs for each vent. It is battery powered and mounted under the power panel that replaced the ash tray.
Click to enlarge
Click to enlarge